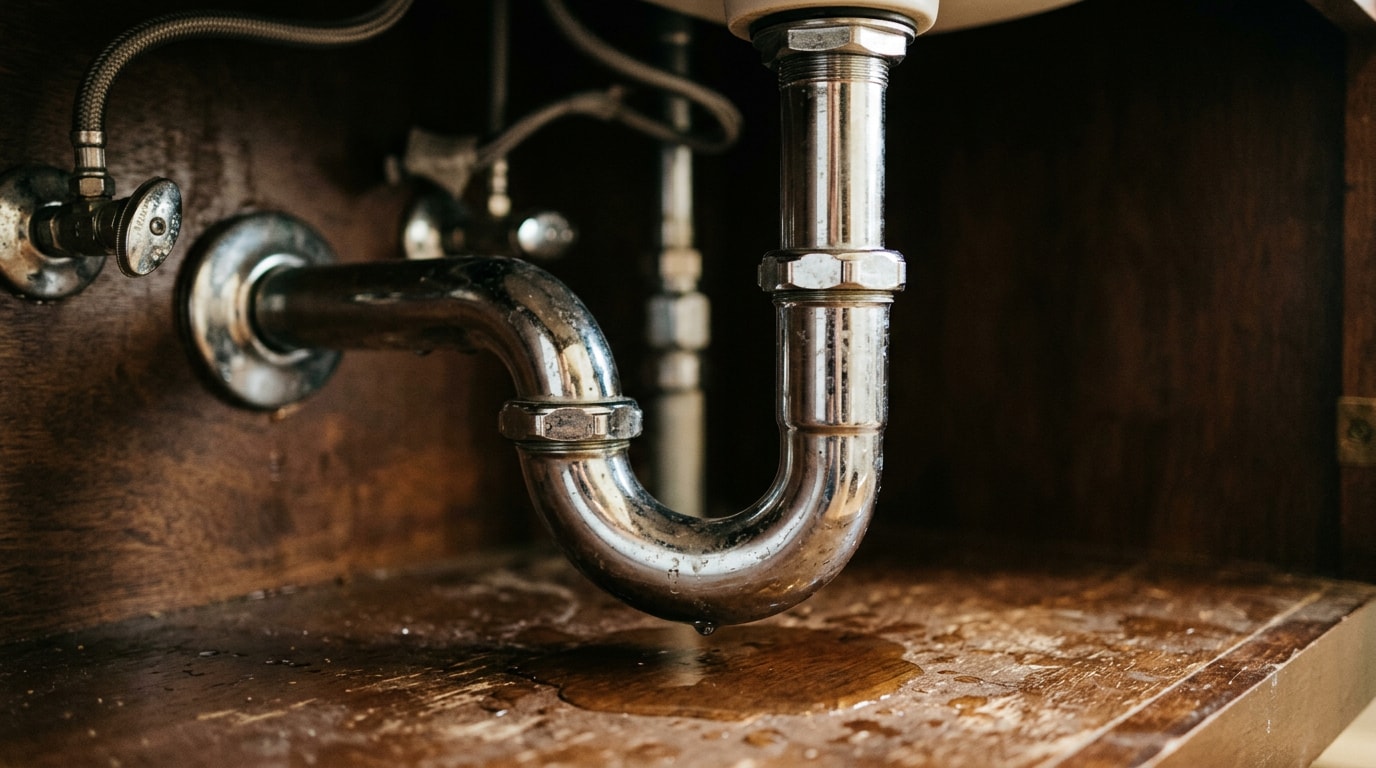
A bathroom sink leaking underneath in Mt Holly, SC almost always means water is escaping somewhere in the drain assembly below the basin, not from the faucet above it. The damage happens unseen, soaking into the cabinet floor while you're none the wiser. Here's how to trace the source, fix it yourself if it's simple, and know the exact moment to call in a pro.
Is a Leaking Bathroom Sink Dangerous?
Yes, more than it looks. A sink only leaks while it's running, so there's rarely a standing puddle to tip you off.
Water soaks into the cabinet floor and subfloor instead, and in Mt Holly's humid, low-lying Lowcountry climate that moisture doesn't evaporate on its own. Indoor humidity above 60% is exactly the condition mold needs to establish itself, according to EPA guidance that indoor mold growth can and should be controlled by controlling moisture, and if there is mold growth you must clean it up and fix the water problem . The agency's own cleanup guidance recommends drying wet materials within 24 to 48 hours specifically to prevent that growth, a timeline most hidden under-sink leaks blow past without anyone noticing.
Catching a slow leak early is almost always cheaper than replacing rotted subfloor or moldy cabinetry later.
How Your Bathroom Sink Drain Assembly Works
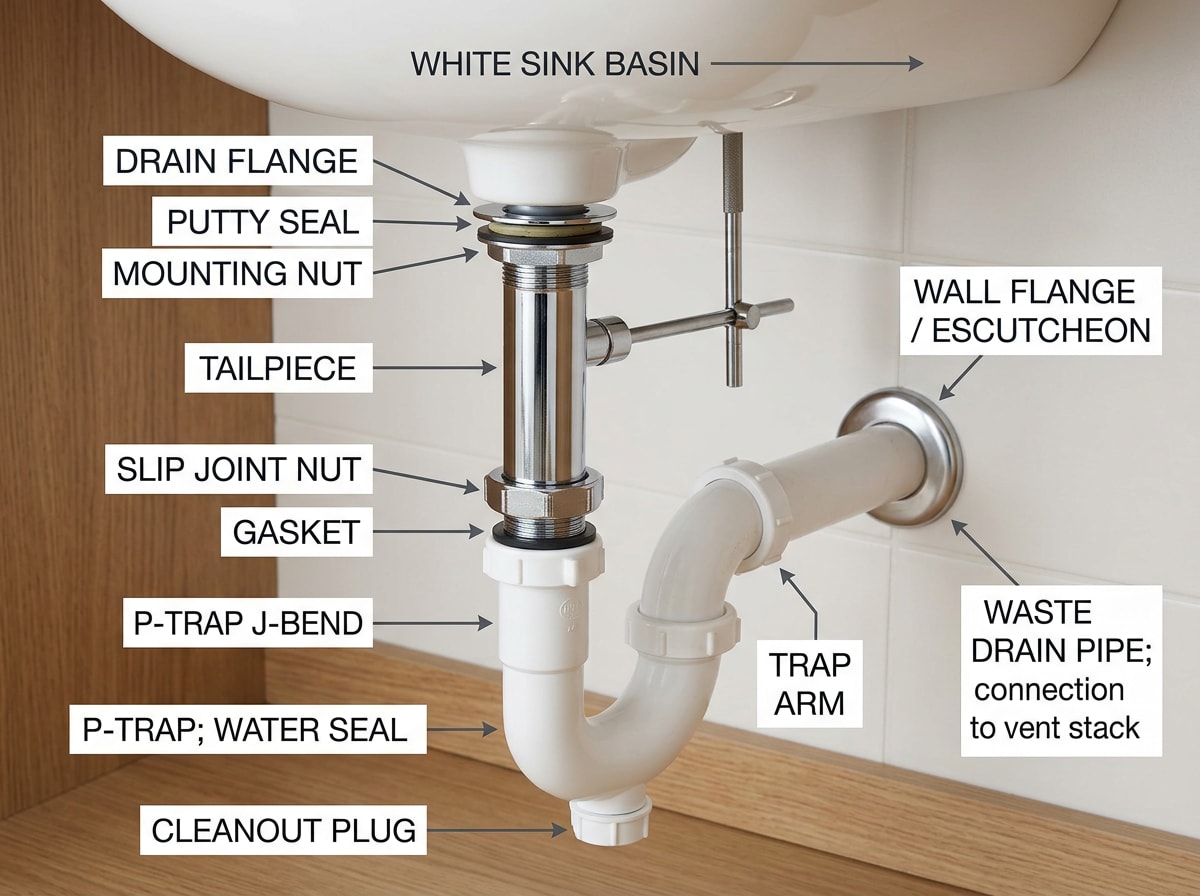
Beneath every bathroom sink sits a connected system of pipes and seals built to carry wastewater away without letting it escape. Five parts matter most:
- Drain body and flange at the basin
- Tailpiece dropping below it
- P-trap curve
- Trap arm feeding into the wall
- Slip nuts joining each section
The strainer nut, rubber gasket, and friction gasket press together to form a watertight seal where the sink meets the drain assembly, and plumber's putty often reinforces that connection underneath the flange. The P-trap holds a small reserve of water at all times, and that standing water is what keeps sewer gas out of your bathroom. Plumbing codes require a liquid seal of at least 2 inches for exactly this reason, per IPC Section 1002.4, which states each fixture trap shall have a liquid seal of not less than 2 inches and not more than 4 inches . A trap with too little water in it, often from a slow leak draining it down, loses that gas barrier entirely.
Once you can picture where each part sits, the causes and fixes below make a lot more sense.
Common Causes Behind Bathroom Sink Leaks
Most leaks underneath a bathroom sink trace back to one of three failure categories. Each has a distinct cause and a distinct fix.
| Cause | Typical Symptom | Fix Difficulty |
|---|---|---|
| Loose connections | Drips only when water runs | Easy — DIY |
| Worn washers or corroded P-trap | Constant seep, worse over time | Moderate — DIY or pro |
| Failed flange seal / old putty | Moisture at basin, stains on cabinet floor | Moderate — DIY or pro |
| Cracked basin or pipe | Leak persists after tightening | Pro recommended |
Loose Connections at Critical Points
Loose connections are the most frequent culprit behind a leaking under-sink problem. Pipes meet at several points beneath the basin, and daily vibration, normal home settling, and temperature-driven expansion and contraction gradually work these joints loose over time. That slack shows up as drips and lingering moisture beneath the sink, even if nothing was ever physically damaged.
Worn Components and Corrosion
Metal parts corrode, and rubber washers and gaskets dry out and crack with age. The P-trap tends to wear faster than other parts since it handles all wastewater passing through the sink. Once a washer fails, the slip nut around it can no longer hold a tight seal, and water starts seeping out with every use.
Fixture leaks like this add up fast on a national scale. Annual household leaks waste 1 trillion gallons nationwide, and the average household's leaks can account for more than 9,300 gallons of water wasted every year , according to the EPA's WaterSense program, which flags common fixture leaks as one of the easiest ways homeowners unknowingly inflate their water bill.
Failed Seals and Deteriorated Sealant
The sink flange creates the watertight seal between the basin and the drain assembly below it. Plumber's putty usually secures this connection, but it shrinks and cracks after years of temperature swings and routine use. Once gaps form in that old sealant, water escapes during normal use rather than sitting still, which is why this type of leak often goes unnoticed until cabinet damage appears.
How to Identify the Source of the Leak
Start with a visual check for water stains, corrosion, or white mineral deposits. These mark the general leak zone even before you run water.
Then work through this sequence:
- Dry everything underneath with an old towel.
- Turn on the faucet and let it run for a minute.
- Check the drain assembly, tailpiece, and each P-trap joint one at a time, wiping each dry as you go.
- Note the first spot that gets wet again. That's your leak point.
On most service calls in Mt Holly and the surrounding Lowcountry, our crews find the leak sitting at a slip nut that was never fully hand-tightened during the last repair or sink swap, not a cracked pipe. If you'd rather skip the detective work, a plumbing leak detection service can confirm the source in minutes with the right tools.
How to Fix a Bathroom Sink Leaking Underneath
Once you've found the source, most fixes follow a similar pattern, though each part needs a slightly different approach. Gather these before you start:
- Adjustable wrench or slip-joint pliers
- Bucket and old rag
- Long-nose pliers
- Plumber's putty
- Teflon tape
- Replacement washers or parts you suspect are worn
Fixing a Leak at the P-Trap
Leaks at the curved P-trap are usually loose or worn connections. Hand-tighten every slip nut and locknut a quarter-turn, firm but not forceful, then wipe the trap dry and run water to test. If drips continue around the slip nuts, remove the trap bend and trap arm, swap in fresh washers, and reassemble before testing again.
Fixing a Leak at the Tailpiece
A cracked or loosened tailpiece connecting the sink drain to the P-trap needs to come off for inspection. Loosen it by hand when possible, since brass tailpieces crush easily under a wrench. A wide rubber band wrapped around the pipe adds grip without marring it. Wrap the threads with Teflon tape before reinstalling, and replace the section outright if corrosion has pitted the metal.
Fixing a Leak at the Sink Flange
Remove the trap bend and drain body to free the flange, then clean away every trace of old, cracked putty from the basin opening. Roll fresh plumber's putty into a thin rope, press it under the flange's lip, and reinstall the drain assembly, tightening each slip nut securely as you go.
Fixing a Leak at the Sink Basin
For leaks right at the basin, use a pipe wrench to unscrew the nut on the underside of the drain flange, then lift the flange free and scrape off the old putty completely. Roll new plumber's putty into a rope, seat the fresh flange firmly in place, and tighten the nut back down.
If the basin itself has a deep or spreading crack, or you're seeing discoloration underneath that won't scrub away, repair may cost more long-term than replacement. At that point, our drain repair service team can give you a straight answer on repair versus replacement, and if the leak has already spread into an active emergency, emergency plumbing repair is available for same-day help.
When to Call a Plumber Instead
DIY works fine for a loose slip nut or a worn washer. Call a licensed plumber when:
- The leak returns within days of a repair you already made
- You see a crack in the basin itself, not just the seal around it
- The shut-off valve under the sink is corroded or won't turn
- Water has already stained or softened the cabinet floor
For homeowners anywhere between Mt Holly and the broader Charleston area, our team handles both the diagnosis and the repair in one visit. Get a free estimate and we'll walk you through what we find before any work starts.
If you're also dealing with a tub or shower drain that's acting up, our bathtub plumbing diagram guide breaks down those parts the same way this guide covers the sink.
For a closer look at our past repair and installation work around the region, check our completed projects, or visit the homepage to see the full range of services we offer Mt Holly homeowners.
FAQ
Why is my bathroom sink leaking underneath?
Most under-sink leaks come down to three things: connections that have loosened from vibration or settling, parts like washers and the P-trap wearing out over time, or the sink flange's sealant drying out and cracking. Identifying which one applies usually points directly to the fix needed.
Is a leaking bathroom sink dangerous?
It can be, mainly because the water often soaks in unseen rather than pooling visibly. That hidden moisture creates the right conditions for mold growth and gradual water damage to cabinetry and flooring, especially in a humid climate like Mt Holly's.
Can a leaking bathroom sink cause mold?
Yes, if it goes unfixed. Mold needs moisture to grow, and a slow leak trapped behind a cabinet wall keeps that moisture present far longer than a leak that's out in the open and gets noticed right away.
Can I fix a leaking bathroom sink myself?
Simple fixes, tightening slip nuts, replacing a washer, or reapplying plumber's putty, are usually manageable DIY jobs with basic tools. Cracked basins, corroded shut-off valves, or leaks that keep returning after a repair are signs it's time to call a plumber rather than keep troubleshooting.
How much does it cost to fix a leaking bathroom sink?
A DIY fix with new washers, putty, and tape typically costs little beyond the price of small hardware-store parts. A professional service call runs higher once labor and diagnostics are factored in, and the exact cost depends on what's actually failing. For an accurate number, request a quote from a local plumber serving Mt Holly, SC.
What tools do I need to fix a leak under a bathroom sink?
An adjustable wrench or slip-joint pliers, a bucket, an old rag, plumber's putty, Teflon tape, and replacement washers cover almost every under-sink repair. Long-nose pliers help when a slip nut is tucked in a tight spot.
---
This guide was reviewed by the licensed plumbing team at KOP Plumbing, serving Mt Holly, SC and the greater Charleston Lowcountry. Questions about your specific leak? Contact us directly.